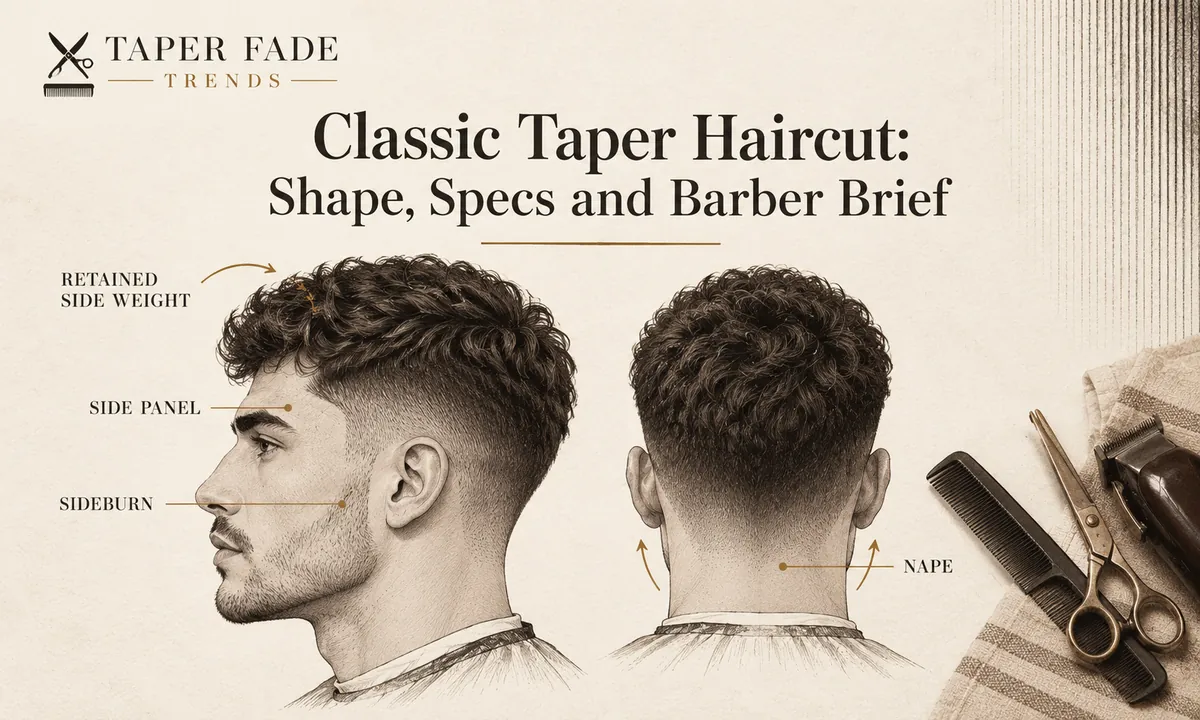
Classic taper haircut: shape, specs and barber brief
A classic taper haircut gradually shortens the sides and back toward the sideburns and nape while keeping more side weight than a full fade. The name doesn’t fix a guard recipe or say whether the very bottom reaches skin. Choose the side coverage, shortest finish, top length and neckline yourself, and bring side and back photos.
What is a classic taper haircut?
A classic taper haircut is a connected short-back-and-sides cut that gradually reduces length toward the sideburns and nape while preserving more side weight than a full fade; the exact shortest finish and tool sequence are choices, not fixed by the name.
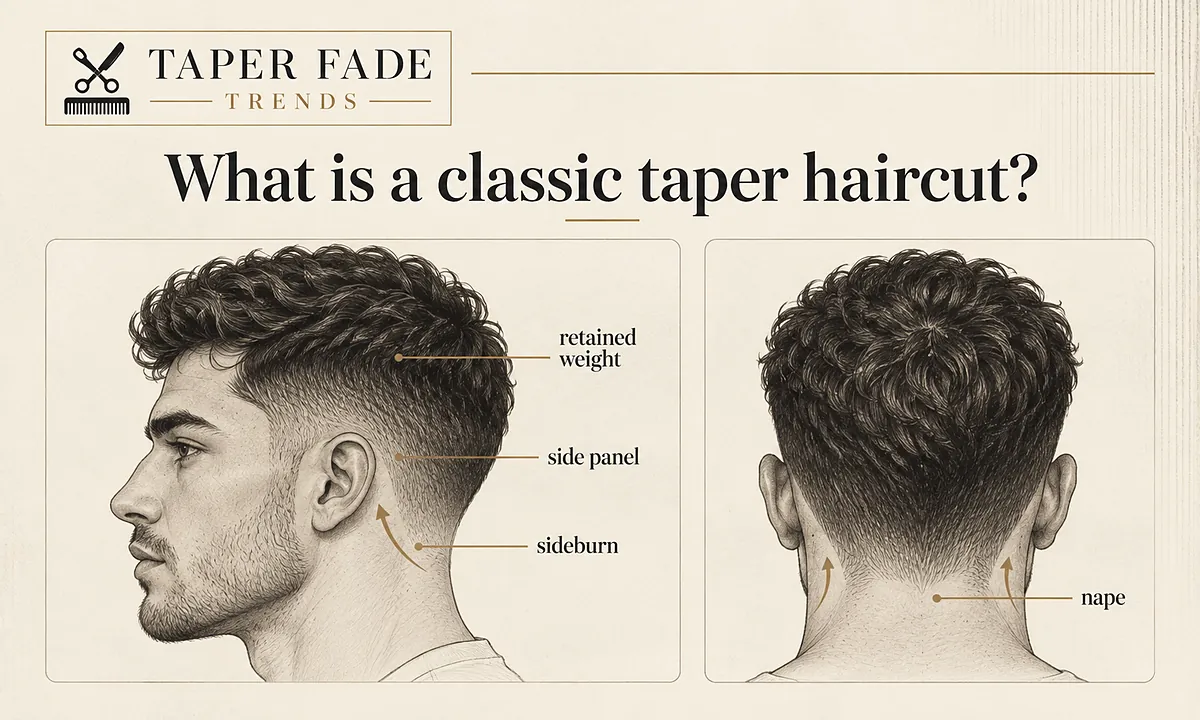
Side weight is the length and bulk left across the side panel, the area between the ear and the top. The nape is the back of the neck, and the neckline is the shape the hair makes where it meets the skin there. Barber.Style draws the line plainly: a taper shortens mainly the sideburns and neckline and leaves the side panel mostly full, while a fade blends a larger part of the sides and back.
Barbering textbooks split this cut into three jobs, according to Wikipedia’s entry on the regular haircut, which draws on mid-century barber manuals. Edging is the outline at the sideburns, around the ears and across the nape. Siding is the graduation of the back and sides above it. Topping is the top. A classic taper is mostly a decision about the first two.
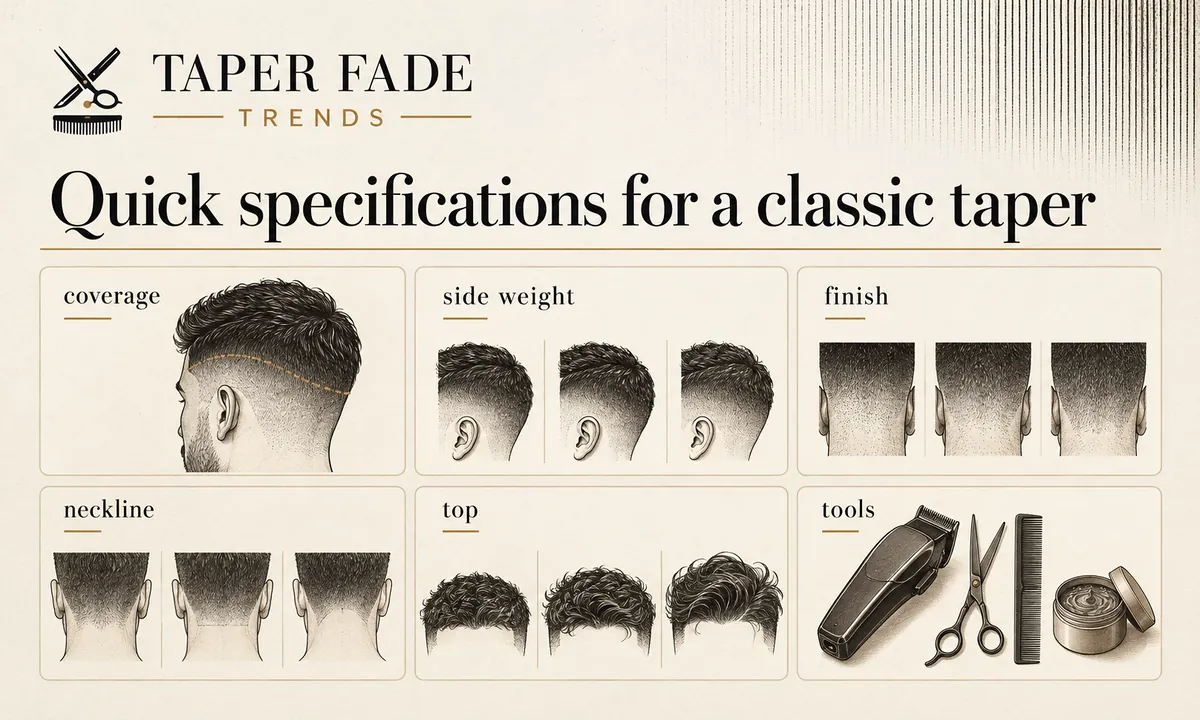
Quick specifications for a classic taper
Only the outline of a classic taper is fixed: a connected graduation toward the sideburns and nape that keeps more side weight than a full fade. Side coverage, shortest finish, neckline, top length and tools are separate choices. The table shows which is which, and what to say for each before the barber starts.
| Spec | Fixed by the name? | What you specify |
|---|---|---|
| Shape | Yes, in outline: graduated, connected sides | That the sides stay connected to the top |
| Side coverage | No; narrower than a full fade, no standard boundary | How far up and around the short work may spread |
| Side weight | Partly; more than a full fade, amount not fixed | How full the side panel should stay |
| Shortest finish | No; sources split on skin | Visible hair, a shadow or skin at the hairline |
| Neckline | No | Tapered, rounded or squared |
| Top length | No | A length that reaches the way you wear it |
| Tools | No | The result; the barber picks clippers, scissors or both |
| Guard numbers | No; a guard is a comb length, not a haircut | Optional: a length you liked, with the brand |
| Reference views | No | One side photo and one back photo at minimum |
| Upkeep | No fixed interval | How much regrowth you’ll live with |
On Wahl’s guide-comb chart, the #1 to #4 guards leave 1/8 to 1/2 inch. Those are hardware lengths, and “What guard numbers actually mean” below explains why they can’t reproduce a cut on their own.
Where the taper sits and how much side weight stays
On a classic taper, the shortest work stays at the hairline edge: the sideburns, around the ears and the nape. Above it, the side panel is graduated gently instead of being cleared, so it keeps most of its length. How far that graduation spreads is side coverage, and the name doesn’t standardize it.
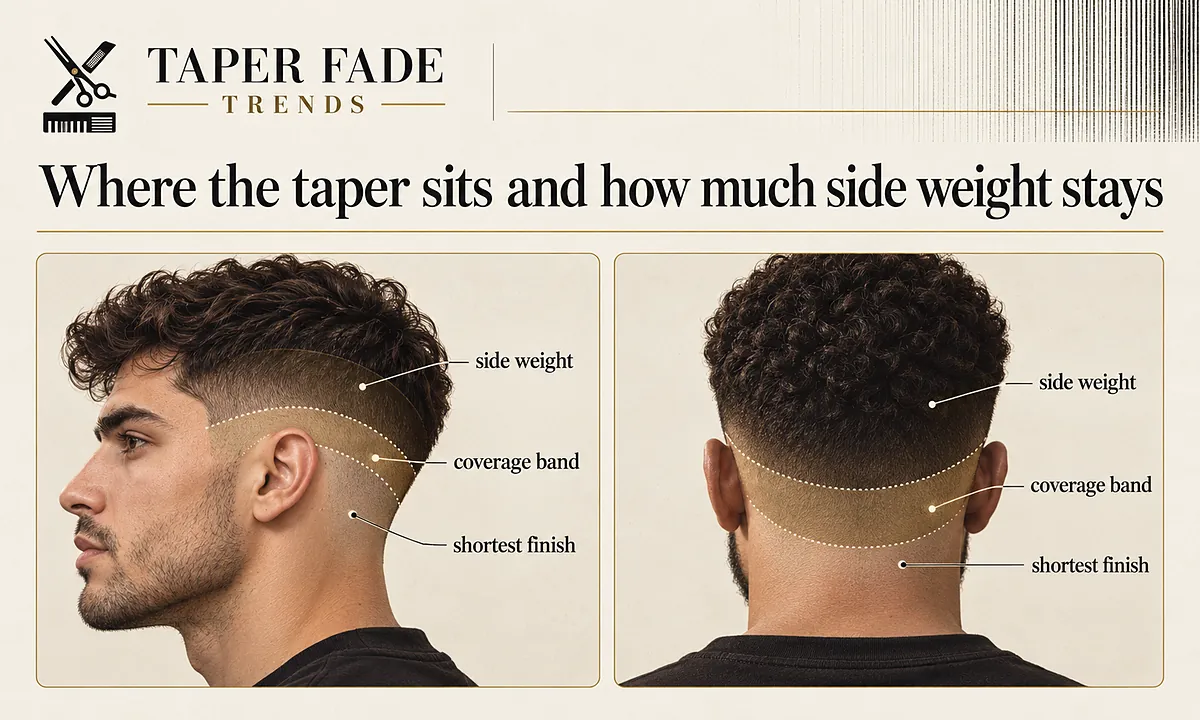
Graduated gently can still mean the whole side. WouldSuitMe describes a classic taper cut clipper over comb from about an inch at the parietal ridge, the widest point of the head where the sides turn into the top, down to about a quarter inch at the hairline. Nothing on that head is very short except the edge, which is why it reads as full.
Height, meaning how far up the side the graduation climbs, is a separate decision. The taper fade guide maps height, finish and coverage across the wider taper family; this page stays with the retained-length version.
Coverage is separate from shortest finish
Side coverage is the width of the side/back panel taken into the shortest graduation. Shortest finish is the hair or bare scalp left at the lowest point of the taper. The two are set separately, so a classic taper with narrow coverage can still end in skin, and a wider one can stop at visible hair.
Two cuts can graduate the same band of hair and still finish differently, one ending in visible hair and the other in bare skin at the neckline. A classic taper usually keeps coverage narrow. Point to where the short work should stop on a profile photo, then name the finish in a separate sentence.
Can a classic taper go to skin?
Sometimes, at the very edge. Many guides define a classic taper as never reaching skin, yet traditional barbering often tapers the nape hairline to the skin with a fine blade while the sides keep visible length. Bare skin limited to the edge is still a classic taper; a skin band across the sides is fade territory.
The sources split cleanly. CADMEN Academy, a barber school, says a taper doesn’t reach skin and that visible skin on the sides or back makes it a fade. WouldSuitMe also calls it a cut that never goes to skin. On the other side, Latest-Hairstyles, edited by hairstylist Cindy Marcus, says a classic taper’s neck is usually tapered tightly from skin, and the barbering textbooks Wikipedia cites describe the standard taper cut’s nape edge going to skin with a zero blade.
Calgary barber Wesley Cheung lands between them: his classic taper neckline only appears to reach skin at the very bottom. Because shops use both habits, say what you want: “visible hair at the bottom,” “a shadow” or “skin at the neckline only.” If you want no skin anywhere, say “no skin, even at the neckline.”
Choose the top length by how you wear it
Top length depends on how you wear the top, not on the name. A side part or brushed-back top needs enough length to reach its direction without being forced, while a natural top needs less. Published starting points exist, but each is one barber’s or publisher’s habit, not a standard.
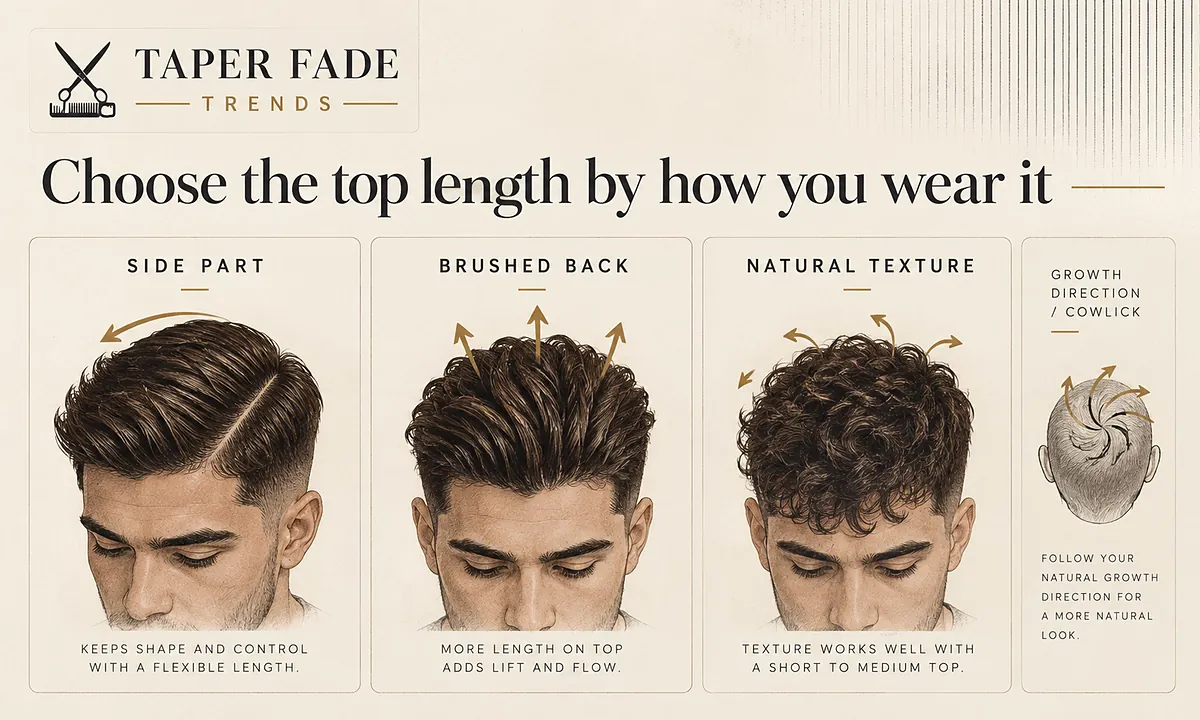
Three examples show the range. Wesley Cheung usually aims for the front to reach about eyebrow level when combed down, adjusted for texture and features. Haircut Inspiration suggests about two inches as a starting point. TaperEmpire gives 2 to 2.5 inches for its business version. Use them to open the conversation, then let your growth direction decide.
| Top you plan to wear | What the length must do | What changes the answer |
|---|---|---|
| Side part | Lie to one side of the part without being forced | Growth direction at the part, any cowlick, density |
| Brushed back | Sweep back from the front hairline | Growth direction at the front, density, texture |
| Natural texture | Fall in its own direction | Texture, density, curl or wave pattern |
Face shape isn’t the deciding variable. WouldSuitMe says plainly that face-shape advice is a convention about proportion, not a law, and publishes its face-shape ratings as stylist opinion rather than measurement.
Side part or brushed-back top
Growth direction sets how much length a side part or brushed-back top needs. It is the way hair falls at the front hairline and the crown, the area at the back of the top where hair often swirls. A cowlick, a patch growing against its neighbors, can push hair away from the direction you want.
Cheung’s advice is to stop fighting a natural part: if some hair splits and stands up when you brush it back, lay it flat in the direction it wants to go. Show your barber where your hair parts on its own before you choose a length.
Natural texture with less styling
A natural top needs less length because it’s left to fall in its own direction instead of being trained into one. Cheung notes that some clients set the top length by their natural wave or curl instead, keeping just enough for the pattern to show. The trade-off is less room to add a part later.
Density and texture change how the same length reads, so tell the barber whether your hair is fine or thick and how it behaves when it dries.
Clippers, guards and scissors
A classic taper can be built with clippers, scissors, clipper-over-comb, scissor-over-comb or a mix, and no single method defines it; the finished lengths and the retained side shape do. Barbering textbooks describe clippers for the outline and scissors over comb for the sides, but all-clipper versions are also used.
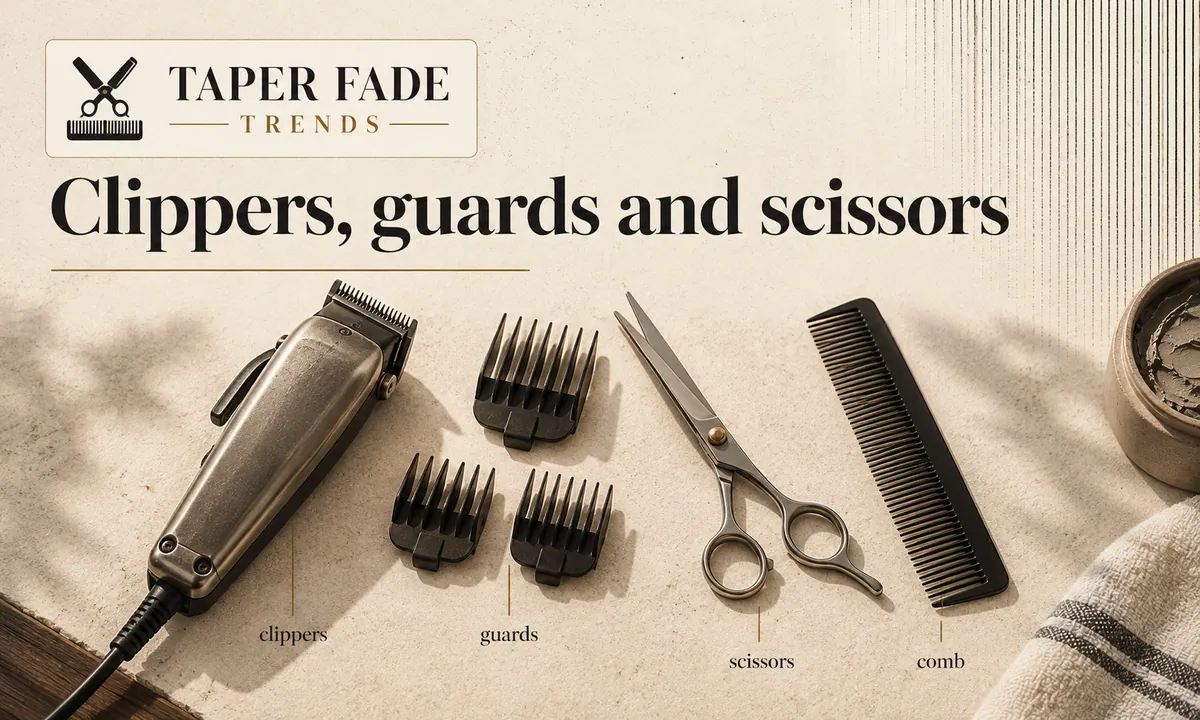
The published guides reflect that range. Haircut Inspiration says your barber may use shears or clippers. Latest-Hairstyles says scissors are typical. WouldSuitMe describes clipper over comb instead of guards, and Cheung’s example uses a guard. Choose the result first, then ask what the barber plans to use.
What guard numbers actually mean
A guard number names how long a guide comb leaves the hair, not a haircut. On Wahl’s chart, a #1 leaves 1/8 inch and each step adds 1/8 inch, so a #4 leaves 1/2 inch. No guard sequence defines a classic taper, and other brands can label the same length with a different number.
Wahl guide comb; other brands and lever settings vary
Wahl guide comb; other brands and lever settings vary
Wahl guide comb; other brands and lever settings vary
Wahl guide comb; other brands and lever settings vary
The same guard can land at different lengths. Wahl explains that its taper lever, the small handle on the side of the clipper, moves the cut closer or longer between guard sizes. Density, cutting direction and over-comb work change the result again. Brand-by-brand differences are in the haircut numbers guide.
How published classic taper recipes compare
Published classic taper recipes don’t agree, which is the clearest sign that the name isn’t a specification. One barber uses a #3 on the back and sides, a barber school offers a #2 at the neckline as an example, and another guide skips guards entirely for clipper over comb. Read each row as one source’s habit.
| Source | Sides | Lowest point | Top | Method |
|---|---|---|---|---|
| Wesley Cheung, barber | #3 on back and sides | Tapered neckline; looks like skin only at the very bottom | Front near eyebrow level combed down | Clipper with guard |
| CADMEN Academy | Not given | Example: #2 at the neckline; no skin | Not given | Not given |
| WouldSuitMe | About 1 in at the parietal ridge | About 1/4 in; natural neckline | Your choice | Clipper over comb, no guards |
| Haircut Inspiration | Clipper setting from #2 to #5 | Not given | About 2 in to start | Shears or clippers |
| Latest-Hairstyles | Grade 2 to 4 | Neck tapered tightly from skin | Not given | Usually scissors |
| TaperEmpire, business version | #3 upper, #2 lower | Tapered neckline; no skin | 2 to 2.5 in | Clippers and scissors |
A photo can’t tell you which row a cut came from. Guard, blade and lever settings don’t show in a picture, so ask the barber what they used when a cut comes out right.
When scissors or over-comb keep the sides softer
Yes, a classic taper can be cut with scissors or over-comb work, and both suit a softer, fuller side because the barber adjusts length gradually instead of in fixed guard steps. Neither is required for every head. Name the side fullness and shortest finish you want, then ask which method the barber plans to use.
WouldSuitMe flags the trade-off honestly: with no guard holding the length, a barber having an off day can leave unevenness that only shows a couple of days later, once the hair settles. Mention density, texture and any cowlick before the first pass, because each changes how a scissor-shaped side sits.
What a classic taper looks like styled and unstyled
Without product, a classic taper still shows its side and nape graduation, because that shape is cut, not styled. The top is what changes: unstyled, it falls by growth direction, density and texture; styled, it goes where your routine puts it. Judge the cut by its sides and nape, and the routine by the top.
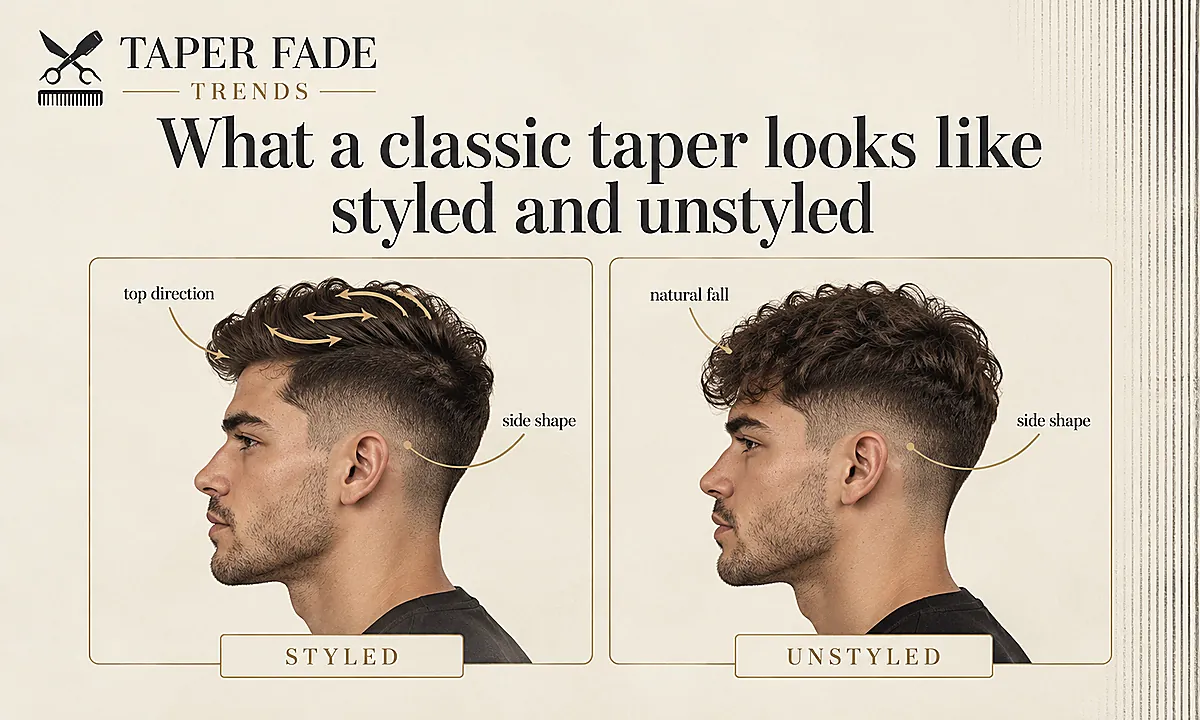
| What you see | Set by the cut | Set by the routine | Varies with your hair |
|---|---|---|---|
| Graduation at sideburns and nape | The shape and the shortest finish | Nothing | Texture and density change how it reads |
| Side weight | How much length stays on the sides | Very little | Density changes how full it looks |
| Neckline | Its shape at the nape | Nothing | Growth direction at the nape |
| Top direction | A length that can reach that direction | Combing, drying and product | Growth direction and any cowlick |
| Top texture and hold | The top length | Product and drying | Texture and density |
That split is the practical appeal of the cut. Cheung points out that with short back and sides, the top is the only part you really style. Tell your barber how you’ll wear it day to day, including whether you use product, so the top is cut for that and not for a styled photo.
Classic taper vs regular taper, taper fade and full fade
A regular taper is often treated as the same request as a classic taper, while a taper fade and a full fade take more off. A taper fade concentrates very short work at the sideburns, temples and nape; a full fade clears a wider band around the sides and back. Every label varies by shop, so confirm coverage and finish.
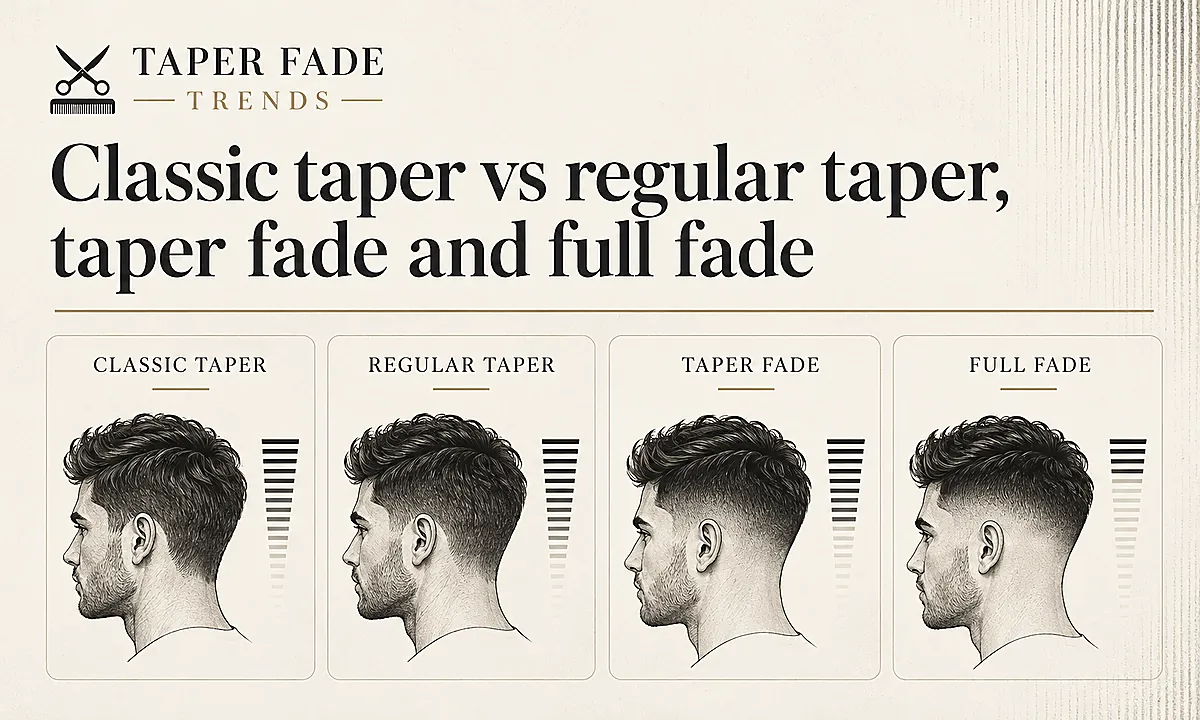
| Label | Area shortened | Side weight kept | Usual shortest point | What to confirm |
|---|---|---|---|---|
| Classic taper | Hairline edges, graduated gently above | Most | Visible hair; sometimes skin at the nape edge | Whether any skin at all |
| Regular taper | Often the same as a classic taper | Most | Same as a classic taper | What the shop means locally |
| Taper fade | Sideburns, temples and nape, cut shorter | More than a full fade | Hair, shadow or skin, by request | Height and finish |
| Full fade | The sides and back all the way around | Least | Often skin; varies by shop | Height and finish |
The labels blur on real heads. A classic taper with a skin-close nape can look like a low taper fade from behind, and a shop may name it either way. The taper fade guide covers that label in full, and taper vs fade compares the two by area, finish and side weight.
How to ask your barber for a classic taper
When you ask for a classic taper, describe the result instead of trusting the name: how much side weight stays, the highest point the graduation may reach, the shortest finish, the neckline, and the top length and direction. Show a side photo and a back photo, and say “no skin” before cutting starts if that matters to you.
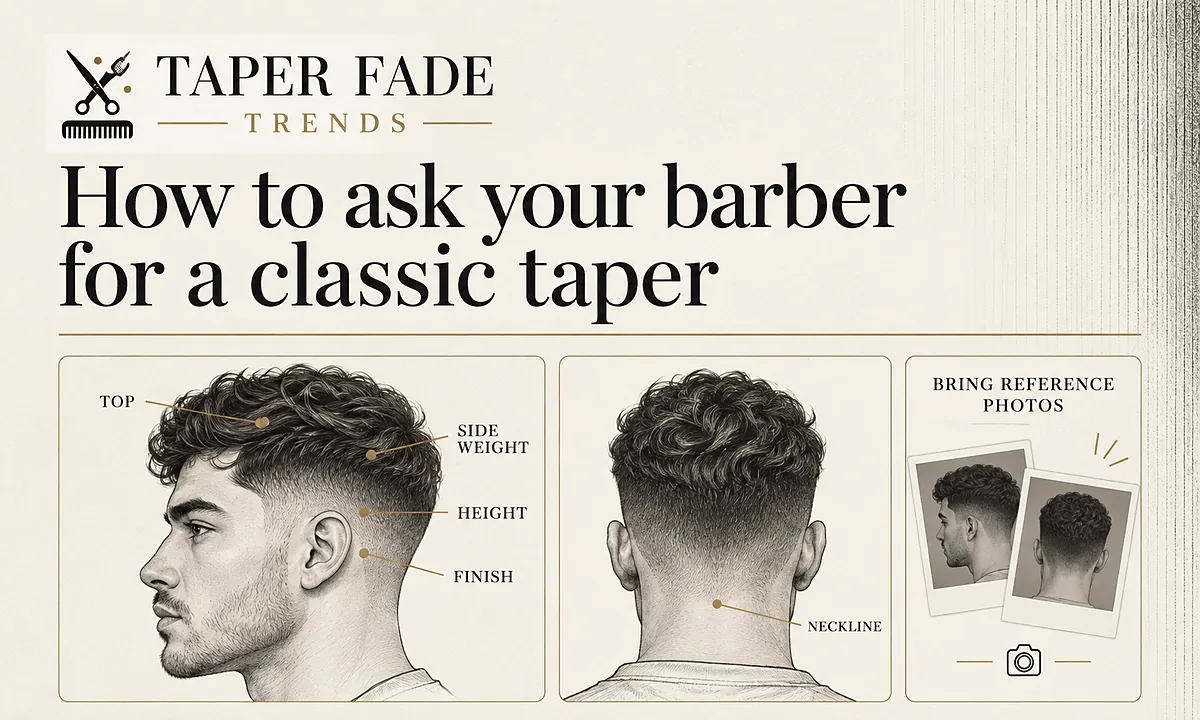
- Side weight: say how full the sides should stay, and whether you want them soft or close.
- Height: point to the highest spot the graduation may reach on a profile photo.
- Shortest finish: visible hair, a shadow, or skin at the neckline only.
- Neckline: tapered, rounded or squared.
- Top: the length you want and the way you wear it.
- Your hair: growth direction, any cowlick, and whether it’s fine or thick.
Bring a front view, both profiles and a back view of the same cut if you can find them. A side photo shows where the graduation stops and how much side weight stays; a back photo shows the nape and neckline, which a profile hides. Ask the barber to repeat the height and finish back to you before the clippers start. The how to ask for a taper fade guide has a fuller check-the-plan routine that works for this cut too.
Styling and upkeep
No single rebooking interval fits every classic taper. Shops publish rules of thumb from about three to six weeks, and the closer the shortest finish, the sooner regrowth shows. Scalp hair grows about half an inch a month, according to MedlinePlus, so a finish cut to 1/8 inch is twice that length within about a week.
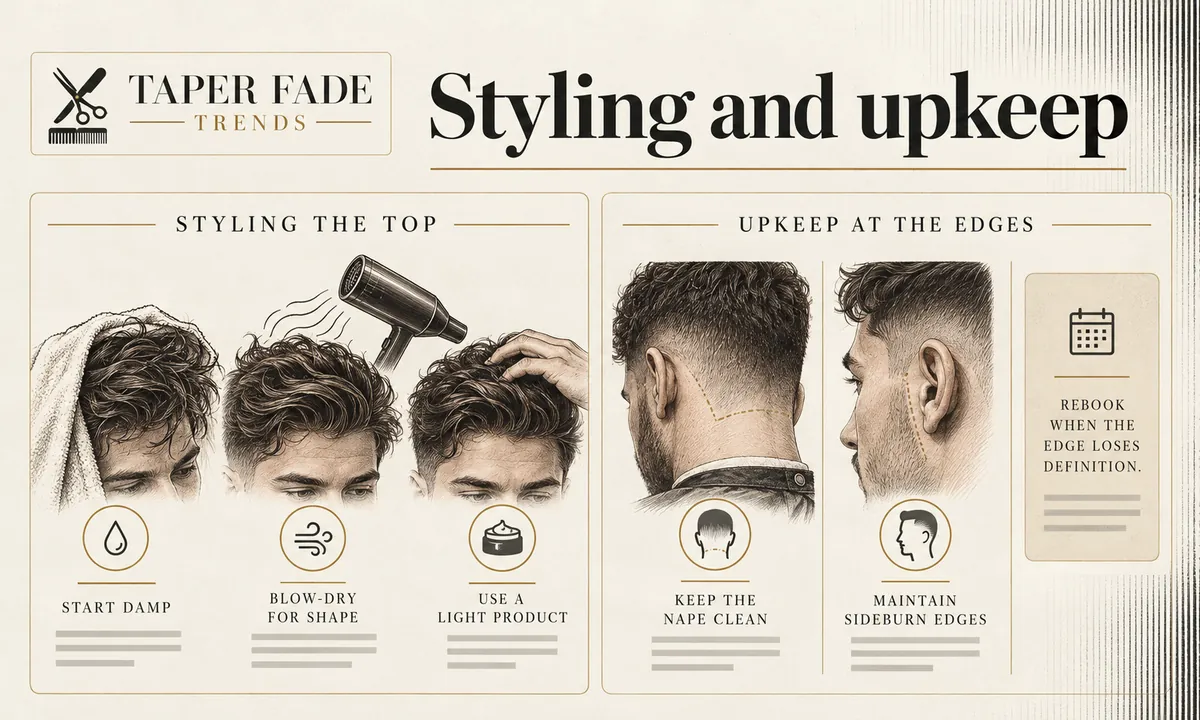
Styling and upkeep are two separate jobs. Styling is the top, every day. Upkeep is the sides, nape and sideburns, every few weeks.
A short repeatable routine
Cheung’s routine for a brushed-back classic taper takes four steps and adapts to a side part. Because the sides and nape are cut to shape, only the top needs work. It’s his published method, not one tested on a recorded cut for this guide.
- Set the direction while the hair is damp, brushing it back or to the part.
- If your hair won’t hold that direction, blow-dry it into place, with a pre-styling spray to help control it.
- Add a little product: matte for a natural look, some shine for more definition, used sparingly.
- Where hair splits and stands up, lay it flat in the direction it wants to go instead of adding more product.
When it stops looking fresh
A classic taper stops looking fresh when regrowth blurs the step between the shortest finish and the hair above it, and the neckline usually goes first. Published guidance from people who cut hair falls in a narrow band, though none of it comes from a measured test.
| Source | Published guidance | Worth knowing |
|---|---|---|
| CADMEN Academy | Every 4 to 6 weeks for most men | The neckline needs attention first; a neckline trim can stretch the gap |
| Barber.Style | A taper stays presentable about 3 to 5 weeks | A sharp skin taper may need cleaning after 2 to 3 weeks |
| WouldSuitMe | Holds its shape about 5 weeks | After that it blurs instead of becoming a different cut |
| Wesley Cheung | No interval given | A blended side and tapered neckline grow out evenly |
Rebook by the look, not the calendar. A tapered neckline blurs gradually, while a squared one shows a hard regrowth line sooner. If you can’t get back often, ask for a longer finish and a tapered neckline, and ask whether the shop does a quick neck-and-edge tidy between full cuts, as Barber.Style suggests.
When a classic taper is not the right choice
A classic taper is the wrong starting point when you want more of the sides removed, a higher line, or a strong contrast at the bottom. In each case the label you need changes, but the brief stays the same: side coverage, height and shortest finish, shown on a side and a back photo.
- For a wider band of short hair around the sides and back, a full fade is the closer match; taper vs fade shows the difference from the side and back.
- For short work concentrated low at the sideburns and nape with a deliberate skin or zero finish, see the low taper fade guide.
- For a graduation that climbs toward the temple, the high taper fade guide covers placement, finish and the barber brief.
- For a top dried up, out or forward over a taper kept to the temples, sideburns and nape, see the blowout taper guide, or the mid taper blowout guide when the taper rises to the temple.
A reference photo has limits too. Short sides alone don’t make a cut a classic taper, and a photo can’t show the guard or lever used, your growth direction and density, or how many days have passed since the cut. Treat it as a target to confirm point by point with your barber.
Method, evidence and image notes
Taper Fade Trends Editorial prepared this guide to help a reader describe a classic taper before a barber visit. The method compares how working barbers, a barber school, haircut publishers and older barbering references define the cut, keeps side coverage, side weight and shortest finish separate, and checks guard lengths against the manufacturer. Where sources disagree, mainly over skin, the page shows the split instead of picking a winner.
This guide contains no photographs of real cuts and no measurements taken from one. Images marked Illustration are illustrations, not documented results. No barber has reviewed this version; when one does, their name, role and review date will be added here. Sources were checked on October 12, 2026.
Sources cited:
- Wahl USA, guide-comb chart and taper lever
- CADMEN Academy, taper haircut guide
- Wesley Snips Hair, the classic taper
- WouldSuitMe, taper
- Barber.Style, taper vs fade
- Latest-Hairstyles, taper haircut ideas
- Haircut Inspiration, taper haircut guide
- TaperEmpire, classic taper haircut
- Wikipedia, regular haircut
- MedlinePlus, hair problems (growth rate)
Found an error? The editorial policy explains how corrections are made and dated, or you can contact us.
Next: compare taper and fade
If the remaining question is how much of the side a fade removes compared with this retained-weight shape, continue to taper vs fade. It compares the two cuts by area, finish and side weight, the same variables used here, with a barber script for each.
Keep reading
All guides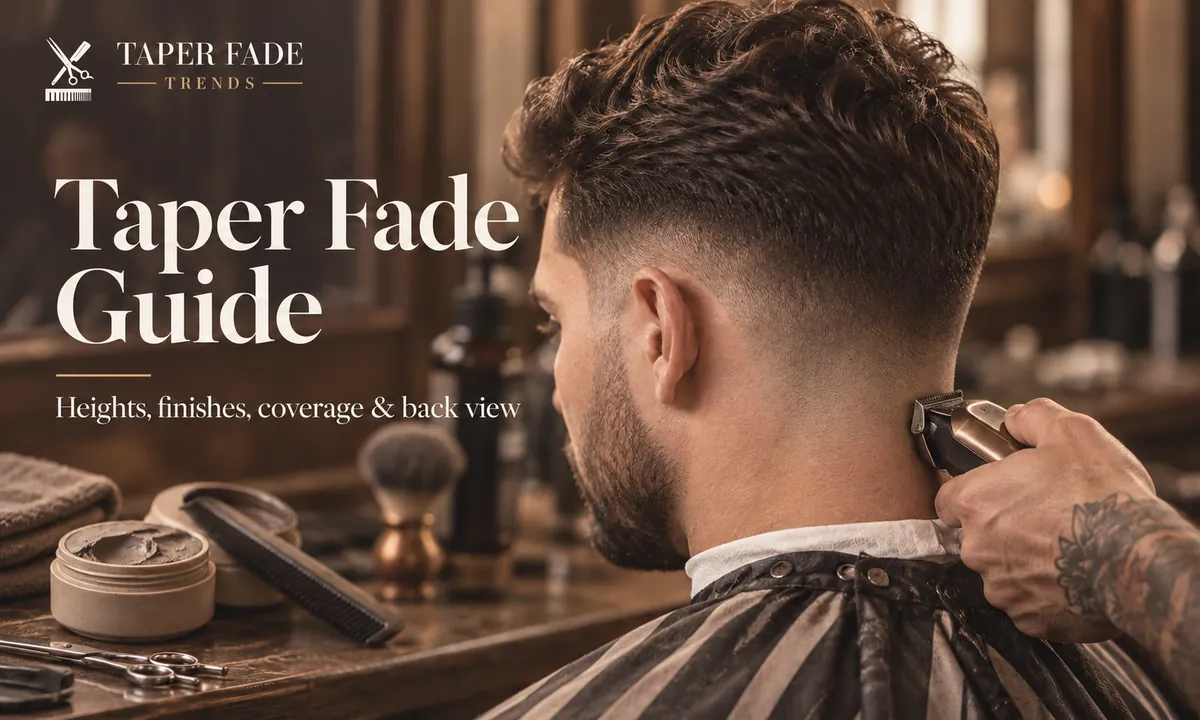
Taper fade: a visual guide to heights, finishes and top styles
Where a taper fade sits from the front, side and back, how low, mid and high differ, and how to ask for side coverage and a finish with or without skin.
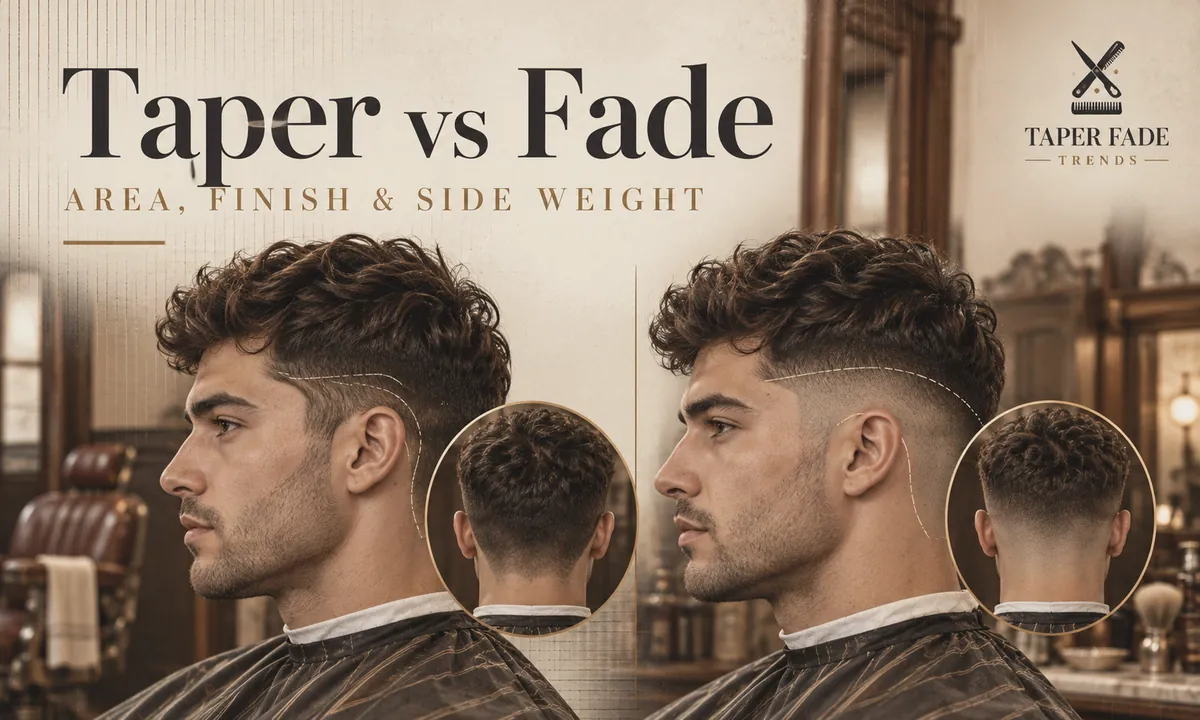
Taper vs fade: what changes in area, finish and side weight
Taper vs fade compared by coverage, height, shortest finish and side weight, with a back-view check and word-for-word barber scripts for either cut.
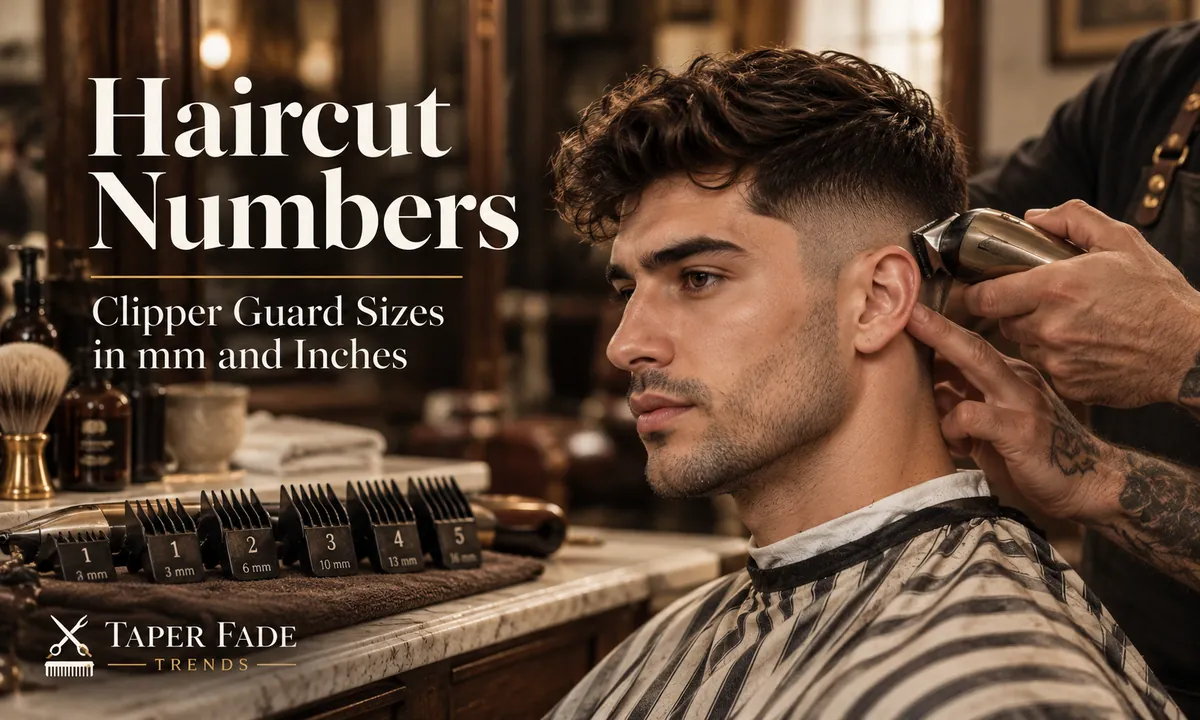
Haircut numbers: clipper guard sizes in millimeters and inches
Haircut numbers in mm and inches, checked against Wahl, Andis and Oster specs, plus why #0 isn’t always no guard and what to tell your barber.
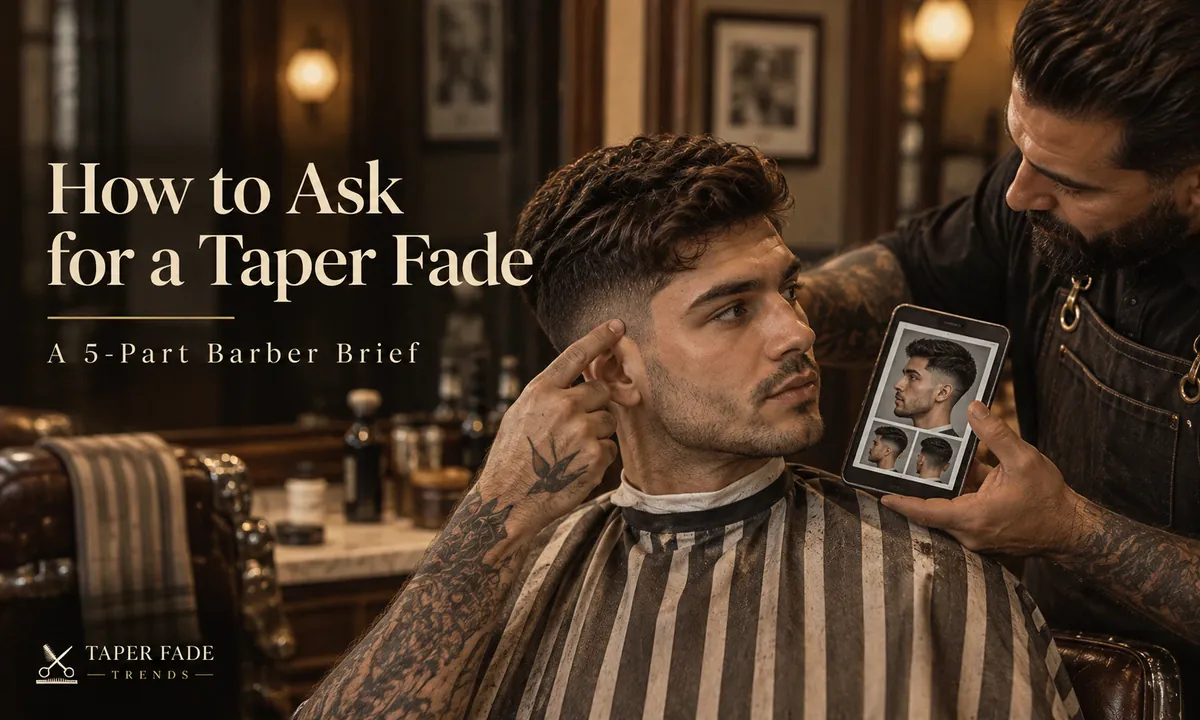
How to ask for a taper fade: a five-part barber brief
How to ask for a taper fade: say where it may reach, how short the base goes, how much side weight stays and what to do on top, then check the plan first.
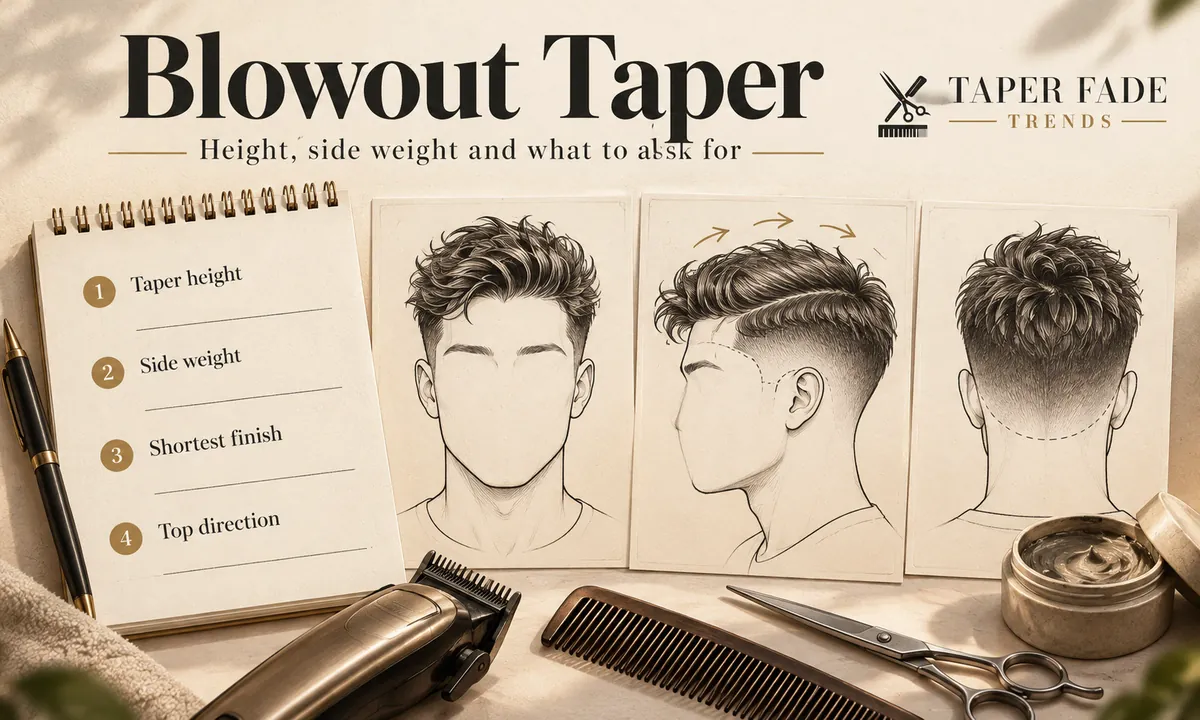
Blowout taper: choose lift, silhouette and taper height
What a blowout taper is, how taper height, side weight and finish differ, how much top length sources suggest, and a barber brief to fill in.
More in taper fade basics
Taper fade basics: all 6- Taper fade: a visual guide to heights, finishes and top styles12 min
- Classic taper haircut: shape, specs and barber briefYou are here
- Blowout taper: choose lift, silhouette and taper height13 min
- Taper vs fade: what changes in area, finish and side weight10 min
- Haircut numbers: clipper guard sizes in millimeters and inches10 min
- Burst fade vs taper: compare the ear arc and nape10 min